
Dominating the Search Results: The Best SEO Company in Toronto
In the digital age, where consumers turn to search engines…

Unlocking Creativity: Splashui CAPTCHA?ap=2 Digital Security
Introduction Security breaches and automated attacks pose significant challenges in…

Unlocking Efficiency: A Guide to MSN Outlook’s Features
Introduction In the present quick-moving computerized scene viable correspondence is…

Common Plumbing Issues in Hemet Homes and How to Fix Them
Are you seeking reliable plumbers in Hemet, CA? Have you…

Budget-Friendly Tips for Those Asking How to Furnish My Home
You have very stylish dreams for your living space that…

What is Suwuianna? Everything You Should Know
Introduction: Our pursuit of inner peace and well-being has been…
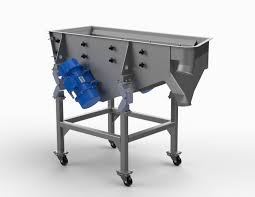
Streamlining Production: Harnessing the Power of Linear Vibrating Screens
In the realm of industrial production, efficiency is king. Every…
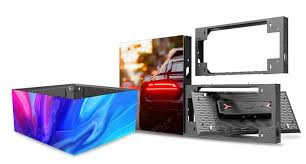
The Evolution and Benefits of Outdoor LED Modules
In recent years, outdoor LED modules have become a revolutionary…

Transform Your Business with Call Tracking: The Best Marketing Trick
In the ever-changing world of marketing, connecting with your ideal…

What is XNXP Personality traits 2021? Know Yourself Test
What is XNXP Personality traits 2021? In the unique scene…

The Years From 2023-1954: Age Calculator – How Old Are You?
February 12, 2024 Step into an existence where the past…

Exploring Rena Monrovia When You Transport Something By Car
Introduction: In the clamouring heart of Liberia, Rena Monrovia isn't…

Unlocking the Power of MSN.com Outlook: A Comprehensive Guide
Introduction: In the present speedy computerized scene, remaining coordinated and…

Modern Sash Windows: A Blend of Tradition and Innovation
Windows are an fundamental part in the engineering of any…

Sweet To Savory: The Delicious World Of Flavored Delta Products
The popularity of flavored delta products is one trend in…

How to Find People on Social Media?
In ultra modern interconnected world, social media has revolutionized the…

Ultrafine Copper Powder: Benefits & Uses
Welcome to our comprehensive guide on ultrafine copper powder. In…

A Brief Discussion On Ultrasound Scan
An ultrasound scan is an imaging technique that holds diagnostic…

Crafting Success: The Role of Purchased Instagram Likes and Followers in Growing Artisanal and Handmade Businesses
Introduction: In today's computerized age, online entertainment has changed the…

What to Do If You Suspect a Gas Leak in Your Home in Riverside, CA
Identifying Signs of a Gas Leak Recognizing the early signs…